Contractor Guide to Installing Reclaimed Cobblestones
Blog is for reference only. Qualified professionals should be consulted on a project specific basis.
Our reclaimed cobblestones are an incredible used paver to feature in your project. Whether you choose antique granite cobblestones or salvaged medina sandstone cobblestone, they offer authenticity and durability… but how do you install these reclaimed products? This blog dives into the step-by-step instructions outlined by one of our best historic stone mason contractors in the area:
Steps for Prepping Project Area
1. Measure project area, then spray paint the edge perimeter.
2. Excavate the surface to proper bed depth of antique cobblestones. Note that the excavation will usually include an area that is 6-8inches wider on each edge of the reclaimed cobblestone project area.
3. Add base stone to project area. Depending on soil type, geotextile fabric can be used between excavated surface and base stone.
4. Using a tamper, compact and level the base stone.
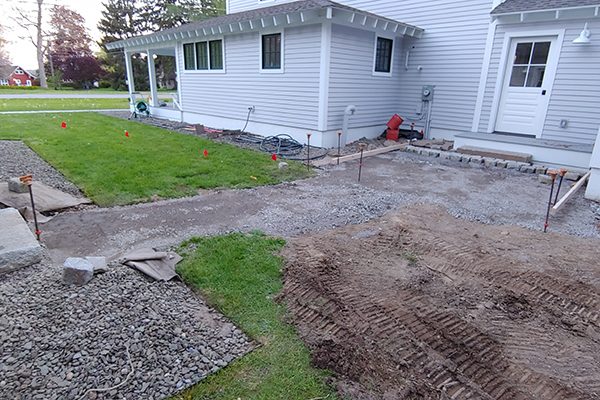
5. Add bedding sand or small stone material to the surface.
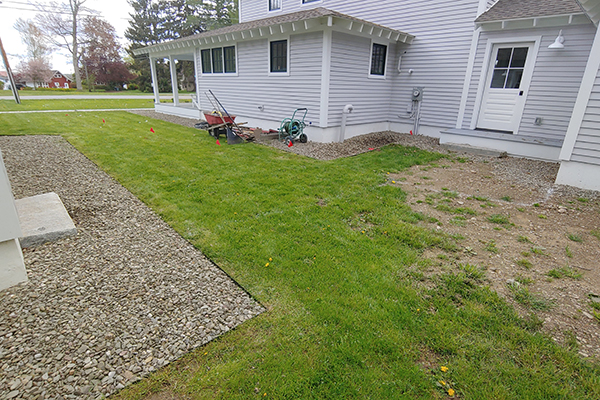
Measure and lay out your project area
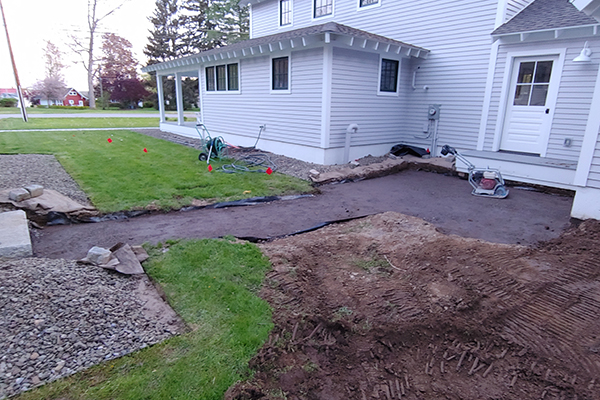
Excavate project area and compact bed material
Installing your Reclaimed Cobblestones
Once you have your antique stone project area prepped and ready to go, as seen in the photos above, it is time to start laying your salvaged stone pavers. Using reclaimed materials is a detailed process that leads to a very high-end result. Here are the steps you should take:
1. Sort reclaimed cobblestones based on size, to ensure each row will be a consistent width. Reclaimed cobblestones come in a variety of sizes; successful projects consider this in each row for the best result.
2. Start installation of your used stone from a corner of the project area, on top of bedding material.
3. Install the antique stone above necessary finished grade. Using a rubber mallet, level the reclaimed cobblestone.
4. Using a stringline as a guide, to avoid exceeding the outline, fill the first row of your historic cobblestones.
5. Using a level, check the flatness of your row and straightness of your paver before moving on.
6. Repeating step 3, use the stringline to guide the second row of reclaimed cobblestones.
7. After installing a few rows, use the level to verify that both axes are at the correct grade. Use the rubber mallet to adjust any bumps and inconsistencies.
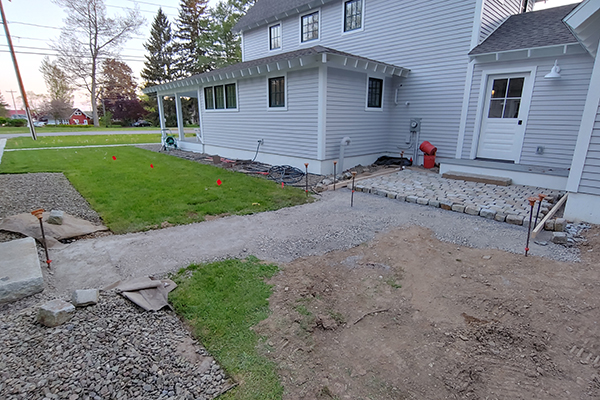
8. Before you move too far down the project area, it is important to fill the joint spaces between cobblestones. We recommend pea-gravel, angular limestone, concrete sand, or a polysand.
9. Remove excess material with a brush.
10. Install project edging – i.e. curb, edging product or other stone border to prevent lateral shifting.
11. Allow surface to dry.
Starting your reclaimed cobblestone project in a corner
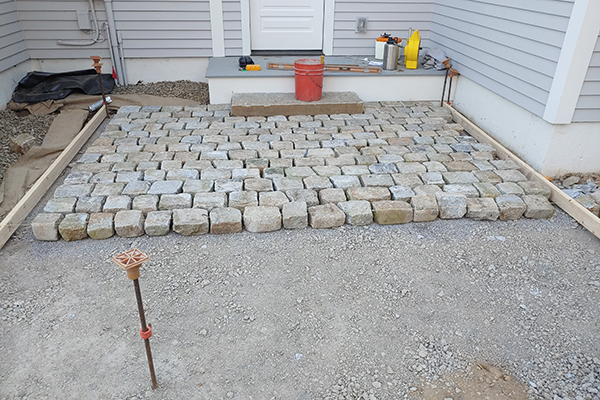
Using a stringline for guidance to ensure straight rows
Continuously check the grade and level of your rows
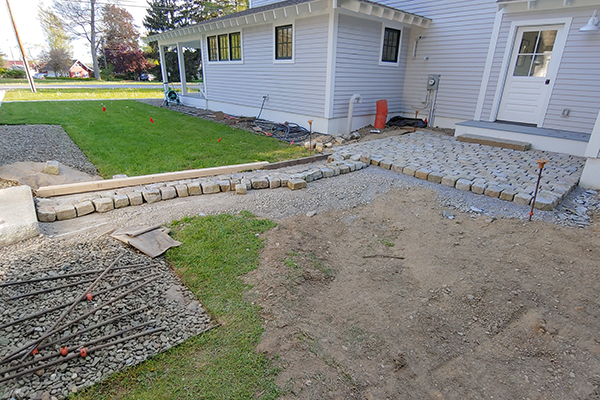
Broom in joint material once rows are completed
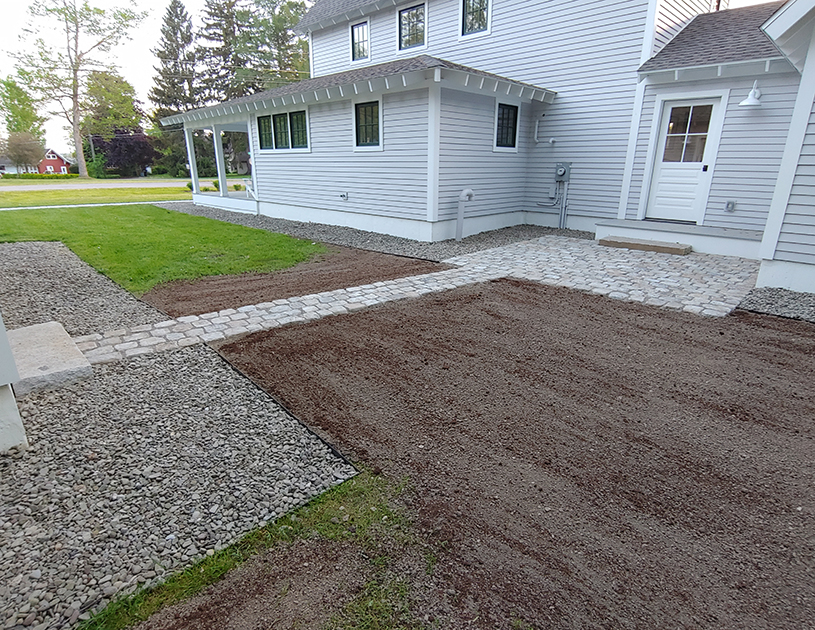
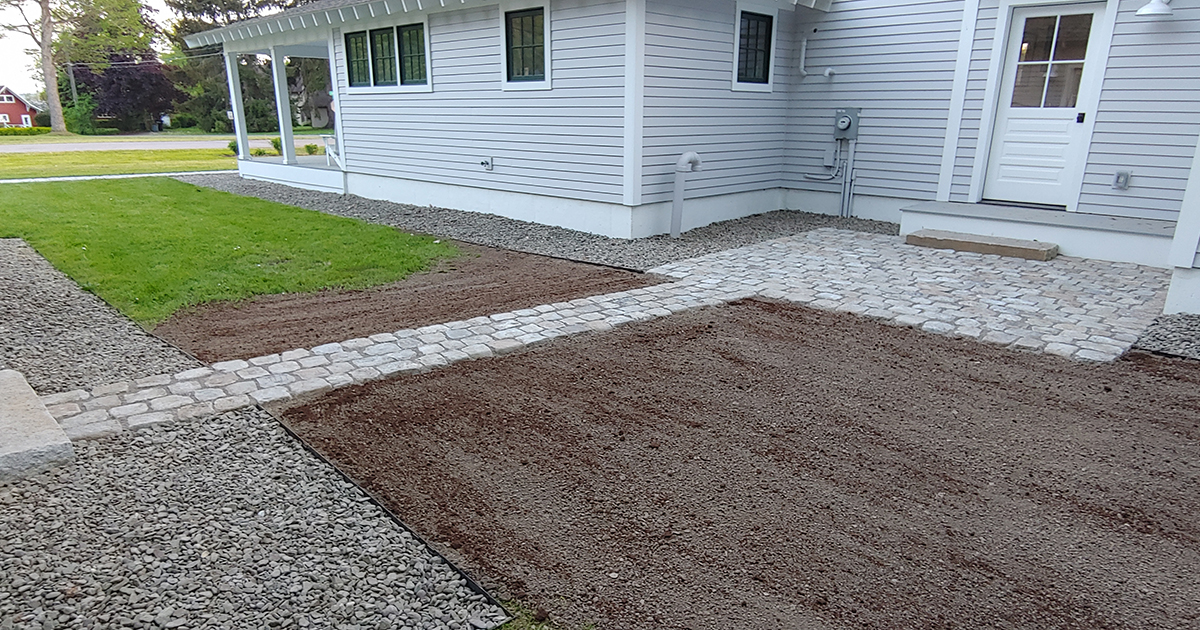
Your finished product – a level, straight, detailed sidewalk and patio using reclaimed granite cobblestone.
 Experienced Brick and Stone